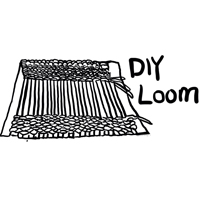
Your weaving kit comes with a cardboard loom, a wooden shuttle and a variety of funky yarns …. so, what can you make with it? Turns out the answer is ‘a lot’ ! By all means, start off with a new rug for Barbie and Ken to relax on by the fire, but you can also make fun and functional stuff for real people too.
How about these ideas to get you started …
- A protective pouch for your mobile phone, your iPod or your headphones? Just make a woven piece then fold it to the right shape and sew it up. A snap or magnetic catch would complete the project nicely.
- An artistic piece incorporating areas of different colour and texture … you can even make pictures with a bit of practice!
- Place mats and coasters. These are quick to do and make great gifts.
- A change purse, book covers, avant-garde fashion accessories; the possibilities go on and on …
We googled ‘cardboard loom’ and found some great ideas and videos. Here is an example:
Google images is also a great source for ideas. You will notice that some items like potholders and placemats work well with thicker yarns, or strips of cotton fabric twisted up to make a thick yarn (like a rag rug). Book covers work really well when woven with flat strips of fabric.
Let’s get you started now with the basic weaving technique.
1. First up, you have to thread your loom with the string that forms the warp. It comes already set up, so just have a look at it and notice the way the string zig-zags back and forth between the top and bottom of the loom
2. Now pick a good length of yarn and tie it on to your shuttle. Starting at the top right corner, begin threading the shuttle through the strings, passing over and under alternate strings. Leave about 8cm of yarn hanging out at the start.
3. To secure the free end, you don’t have to tie it on to anything. Using your fingers, loop it around the right hand string and weave it back in just below the first row, again alternating over-under-over. Tuck it up against the top row.
4. Continue your weaving from the left hand side. Loop the yarn around the left-hand string and begin threading the shuttle back into the loom, alternating over-under-over … Make sure that your second row is OVER where the first row was UNDER, and vice versa!
5. Don’t try to pull the yarn tight. If you do, you will pull the strings in as you go down the loom and lose the nice square shape of your woven piece. When you loop around the far right or left string at the end of a row, just make sure that your yarn doesn’t have a loop sticking out at the side. The weft (yarn) should be snug against the warp (string) but not tight!
6. Each time you come to the end of a row, push the row up against the previous one. A comb makes this quite easy, but you can also use a fork or just your fingers.
7. To make stripes or colour/texture blocks, you will need to switch yarns. You don’t need to tie the yarns together - it’s enough to cut the first one off and then back track by a few strings before starting with the new material (i.e. make the two yarns overlap by a short distance). You can also weave with two different yarns at the same time. It fills the loom faster and you can create some interesting textures!
8. When you reach the end of your piece, cut off the yarn with about 8cm extra length and weave it back in to the fabric, just above the last row.
9. To remove your work from the loom, bend the tabs up and lift the work up and off the loom. Pull the strings one by one at the bottom to snug the loops down against the top of your weaving. Now you should have no string at the top and extra string at the bottom. Snip each of the big loops at the bottom to leave lots of long strings hanging down. Now go across and tie each string to its neighbour. When all the strings are tied snug against the work, cut off the excess (unless you want tassels!) If you do want tassels top and bottom, start your top row of weaving a bit lower down the loom, to give you longer loops at the top and bottom after you have finished.
10. MOST IMPORTANT: Have a ton of fun and share your creations with us here at MakerMobile.org !


